How To Install An Upflush Toilet?
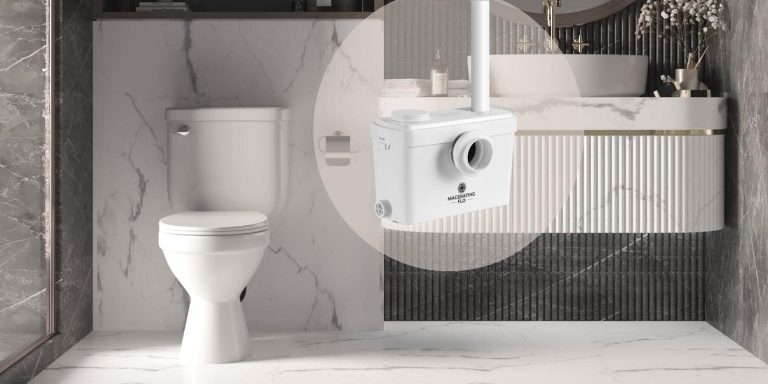
The trailblazing macerator system permits you to add a brand-new toilet for basement and any corner of the home. Without hiring a professional plumber, you can install a macerating pump yourself since it’s a DIY project that doesn’t demand expensive plumbing. Moreover, the macerating system cuts down the requirements of complex plumb work. That’s a perk if you know how the upflush toilet system works. Now let’s guide you step-by-step on how to install a toilet with pump painlessly.
Things You’ll Need To Install Your New Upflush System
Before getting into the installation of the new upflush toilet system. Ascertain that you own the following devices and setups:
- Macerator pump of your preference
- The accessible water supply
- The range of discharge pipe should be around ¾” to 1″
- The preferable source of power also the GFI breaker
- A venting point
How To Install An Upflush Toilet System?
As we know what a upflush toilet is and what it consists of, we will guide you steps for install every component, mainly including a toilet and a macerator pump.
1. Install The Ceramic Toilet Bowl And Tank
Step 1: Evaluation Of Accessories
Evaluate the integrity of accessories and packing list.
Step 2: Fix The Floor-Mounted Toilet Bowl
- Dot the mounting holes by placing the toilet at the installation place.
- Drill the marked holes in the tag as well as do the insertion of expansion bolts.
- For accurate and stable installation, marking the align holes help simplify the procedure.
- Now, put the anchor bolts and screw on. It keeps the toilet securely in place and avoids the risk of wobbling.
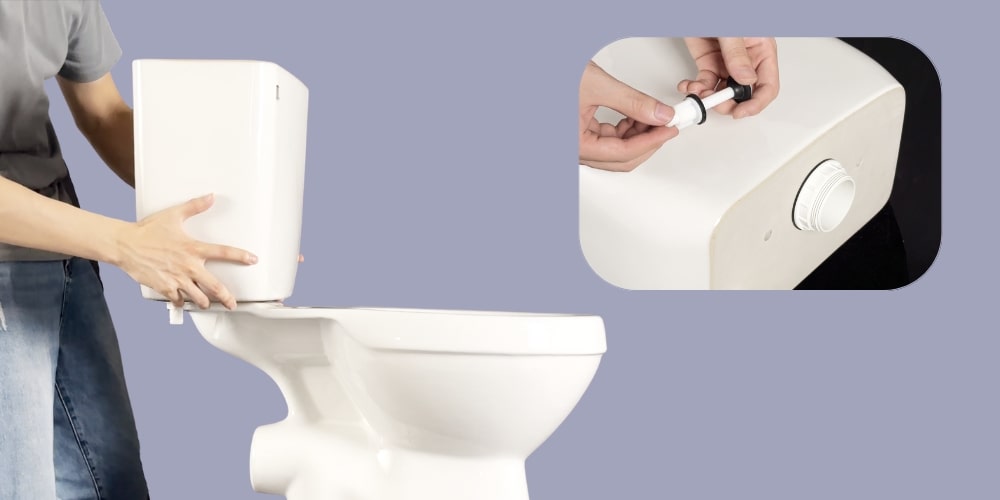
Step 3: Setting Up The Water Tank
- After placing the anchor bolts in the water tank of the discharge tube, fasten the rubber ring to make sure it does not leak. (Note: If you are using a one-piece toilet for your macerating system, you can skip this step.)
- In the bottom holes of the water tank, insert the screw.
- After tightening the screws, the water tank is set up.
- Install the flushing setting. It is a button or a lever. Just make sure it is correctly located.
- Link the Valve
Step 4: Fix The Toilet Seat And Lid
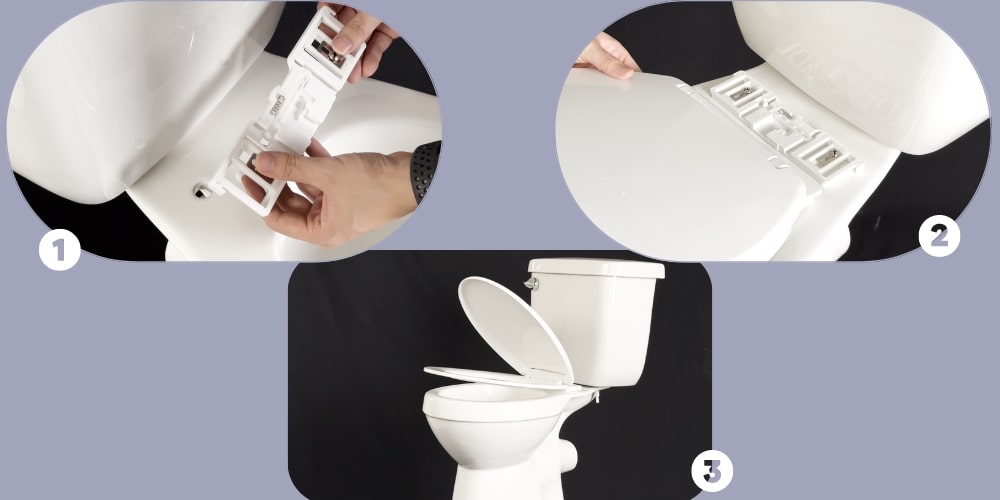
- Secure the expansion bolts inside the seat holes.
- Insert the sticks within holders and double-check pins match up with the seat sockets.
- Conceal the protective shelters and adjust the screw.
- Connect the toilet seat and lid over the pin and then insert.
Note: Bear in mind a few steps of toilet installations may vary according to different types on the market.
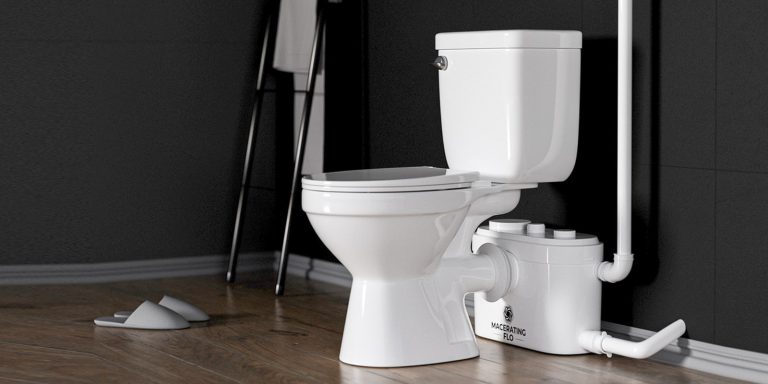
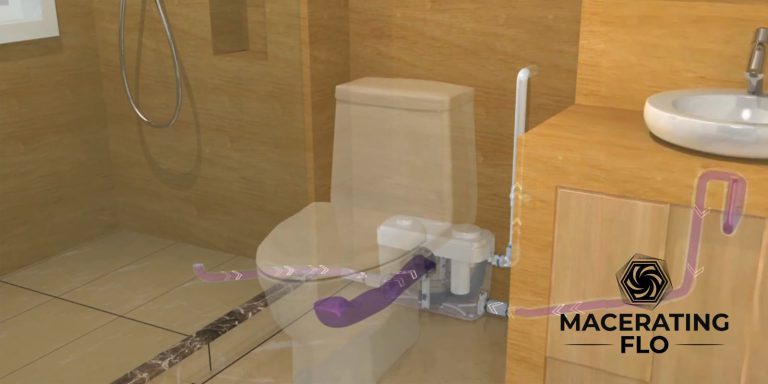
2. Assemble The Macerator Pump
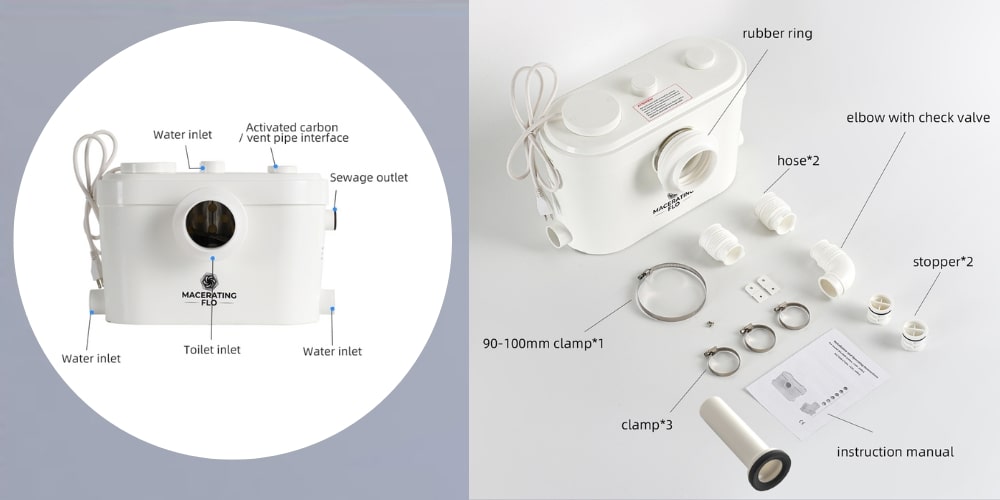
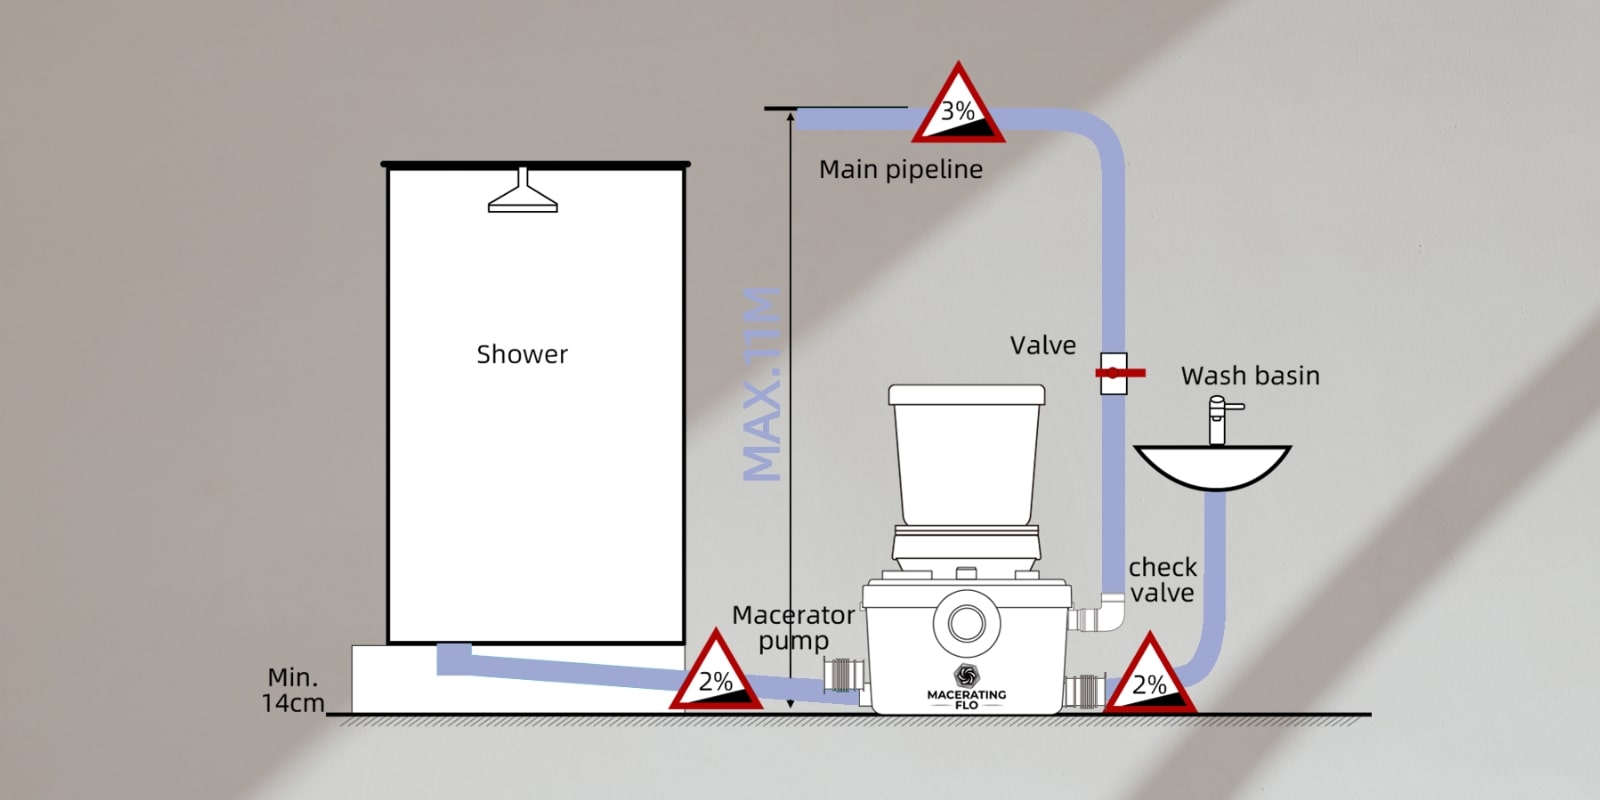
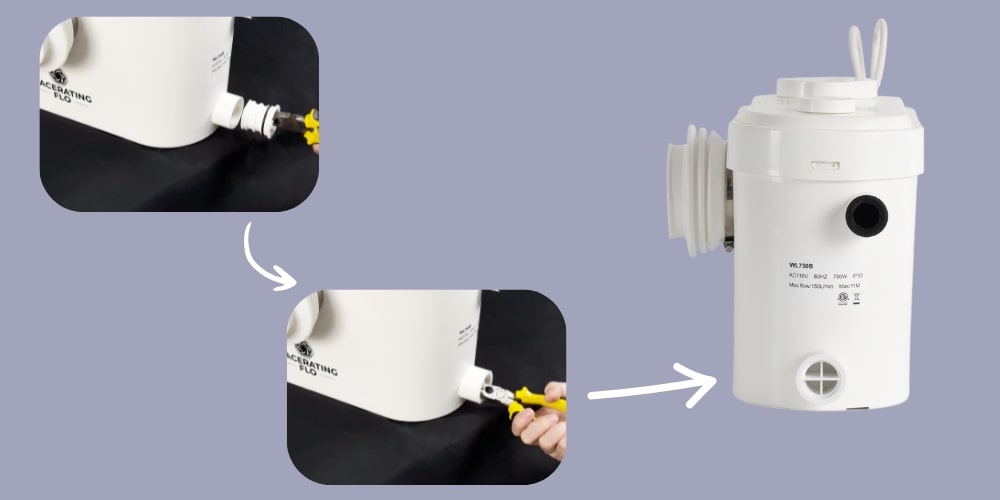
You can see inlets on the macerator pump. The front hole will be linked to the toilet trapway outlet. The other inlets can be connected to the sink or a shower room. At the bottom, first, check the check valve by removing the cover that reduces the backflow. And then install the outlet pipes.
- Type 1: Toilet is Installed Not Below The Main Sewage
The outlet pipe is an elbow pipe with a check valve. Some outlet pipes are designed to be compatible with 28mm, 32mm or 40mm PVC drainpipes. With 3 sizes of elbows are available, but it is recommended inserting a 32mm PVC pipe. With the help of a clamp, you can easily fasten it firmly on the outlet pipe.
- Type 2: Toilet is Installed Below The Main Sewage
For this situation, there will be no need for the elbow pipe. Just remove the check valve from the elbow pipe and fix it to the water outlet point, which is to prevent the sewage from returning. Then install the hose and PVC drainpipe onto the outlet.
3. Connect The Macerating Pump With The Toilet Trapway
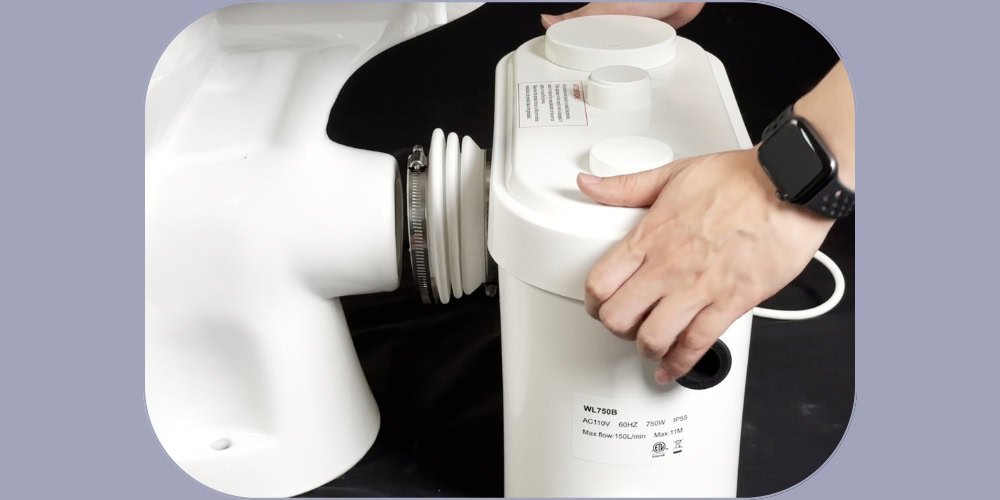
- Attach the rubber hose to the pump’s front inlet hole and secure it with a clamp.
- Then putting a rubber ring on the toilet trapway.
- Connect the hose to the toilet trapway outlet and fixing the rubber ting with a clamp.
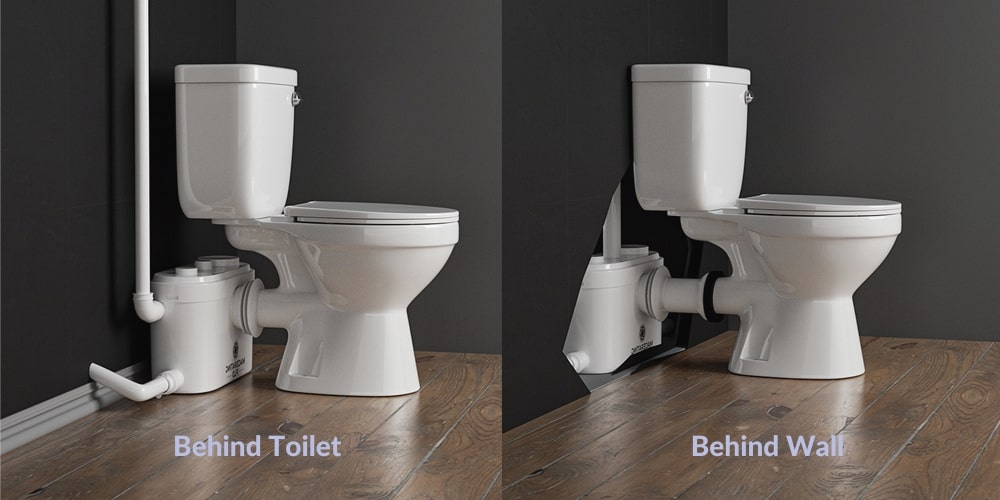
Note: If you need to install the macerating pump on the other side of the wall, you need to use an extension pipe, then put the extension pipe into the toilet water outlet. Make sure it is firmly and can not be pulled out, then connect the other side of the extensive pipe to the pump inlet.
4. Connect Other Inlets On Both Sides Of The Pump (Optional)
Besides using the macerator pump for toilet, you can install these inlets. Attach the host inlet and cut off the excess part with scissors. Put in the PVC inlet pipe with a specific diameter of 40mm and balance the free inclination to ensure no waste remains in the pipe. You can implement the same steps for the other side inlet hole of the macerator pump. The water inlet pipe on both sides should be with free inclination. Make sure that there is no sewage remaining in the pipe. After installing the inlet pipes on both sides of the pump, a 3% inclination should be applied on them.
Note: If you do not need to use these two inlets, please block it with a cover.
5. Ventilate The Pump
The vent pipe of 1-1/2 inch is the basic requirement of all macerator pump products. It should be connected to the main vent stack according to the plumbing codes. Also, you can ease the vent toilet for the basement or wherever you desire. There is only one condition, i.e., air should easily move into the vent system and out and must comply with local code.
6. Link The Macerator Pump To The Power
You’ll have to link the macerating pump to a power socket. Try to seek the GFCI (Ground Fault Circuit Interrupter) with an electrical circuit and plug it into a power outlet. Most of expert plumbers suggest the electrical circuit of 15-amp.
Should I Hire A Plumber?
One of the perennial questions that are mostly asked in the upflush toilet installing world is, Do I require the assistance of a plumber? Undoubtedly, the answer hinges on your personal preferences and skill level. Most users purchase the macerator toilet system and do the installation themselves, even having zero plumbing experience. This toilet system is intended to be streamlined. That’s why people choose it, neither dropping the ceiling nor destroying the floor.
Set up a toilet for basement and any space without break the home apart. Most DIY toilet pump fixing jobs could take less than 3 days if you have any experience in plumbing projects. You may quickly tackle and lift the macerating pump and toilet and can finish the installation without worrying.
However, you should hire a skillful plumber if you don’t want to learn how to install the macerating system. Within roughly 4 hours, your upflush toilet system will be ready to use.
Tips On Installing An Upflush Toilet
There are a few tips and professional insights for seamlessly installing the upflush toilet system. If you keep these in mind, you can surely enjoy the effortless and perfect macerating toilet fixing in no time.
Deliberate On An Extension Pipe
Firstly, consider the extension pipe length. In case you have already bought it to conceal the macerator pump behind your bathroom wall. Ensure the highest length must be 18″ very helpful for most of the macerating system models. Meanwhile, the compatibility of the extension pipe for each model may vary.
Maintain Pipes Stability
Pipes are essential for the discharge system and water supply in the upflush toilet system. Check and remember the manufacturer’s recommendations for the pipes. Regular maintenance and optimal support prevent blockage, which helps maintain your macerator pump’s health.
Prevent Freezing Damages
Use the approved and suitable wrap to protect your pipes externally if your discharge pipes are susceptible to freezing. It is helpful to avoid leaks and breakage. If you establish the bathroom with macerating toilet system in a minimally used area or an unheated building, please ensure to winterize the macerator pump.
Attach To A GCI
Before commencing the upflush toilet system use, ensure it’s linked to the ground circuit interrupter (GCI). Many problems, including dangerous voltage and power surges, will be resolved. Furthermore, this ensures that macerating system is running smoothly. Don’t remember to disconnect the macerator pump before maintenance or cleaning.
Try To Keep The Discharge Pipe Bends-Free
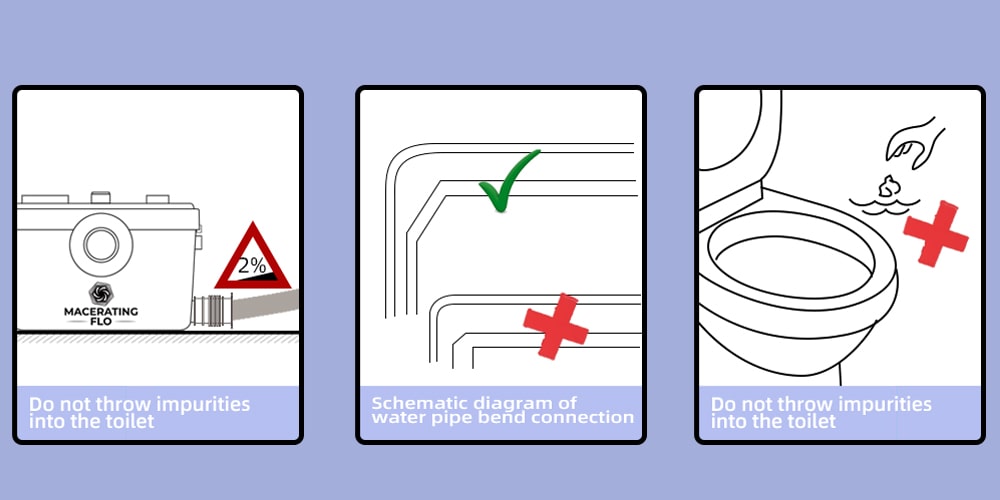
The installation professional always recommends using the discharge pipe, which has as few bends as possible. Bonuses of keeping the discharge pipe less bends are preventing clogging and odor, reducing maintenance, and improving efficiency. Regular maintenance would avoid blockages and clogging for top-notch results and a flawless flow system. If there must be a bend, it should be kept 45 degrees or less.